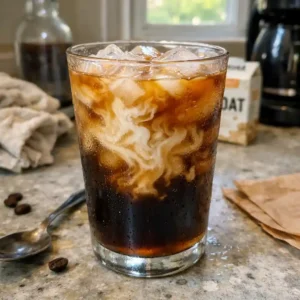
Kombucha recipe—those two words hold a lot of charm in my kitchen lately.
I still remember the first time I tried making kombucha at home. I’d just returned from a trip to Portland, where a tiny market stall offered samples of homemade fizzy tea in weird little glass bottles. One sip, and I was hooked. There was something earthy, tangy, and alive about it—and I needed to know how to make that happen in my own kitchen. That curiosity led me down the rabbit hole of fermentation, SCOBY care, and second fermentation flavors. This guide is the culmination of everything I’ve learned from that journey.
In this article, I’ll walk you through a simple, authentic kombucha recipe that you can easily make at home. But we won’t stop there. You’ll also learn:
- What kombucha really is and how it’s been used across cultures
- Every ingredient and tool you’ll need to start brewing
- Step-by-step instructions for first and second fermentation
- How long to ferment, flavor ideas, and how to store it safely
- Common mistakes I made (so you can avoid them!)
- Gut-health benefits traditionally associated with kombucha
- And yes—we’ll even cover why kombucha was once taken off the market
This guide is more than just a recipe—it’s a homebrewer’s story, told by someone who once wondered if fermenting tea in a jar was “gross” or “magic.” Spoiler: it’s a bit of both.
Looking for inspiration? Try this kombucha fermentation overview to get warmed up.
Now, let’s get into the fizzy magic of homemade kombucha.
Print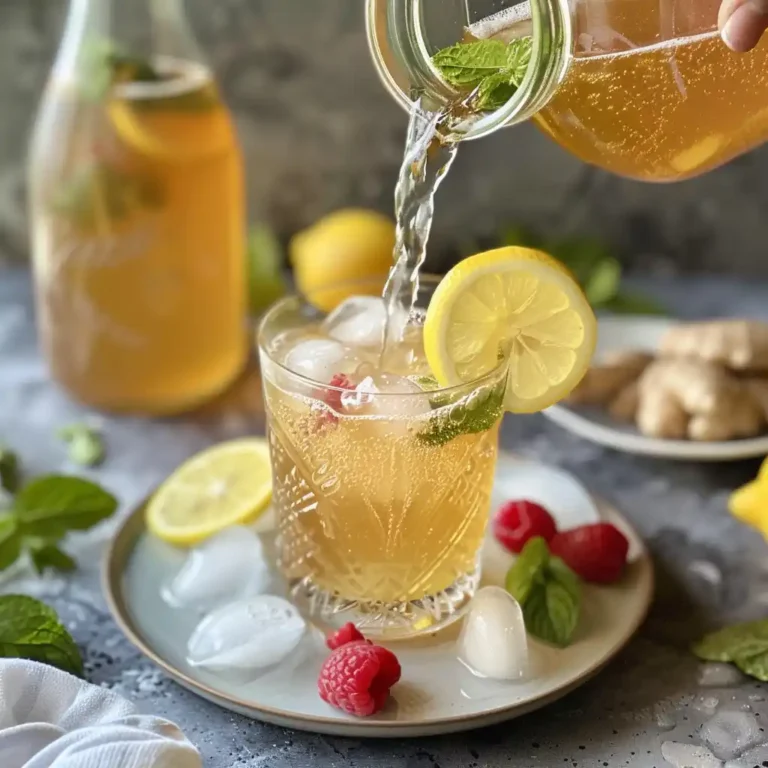
Kombucha Recipe
This simple, authentic kombucha recipe walks you through how to brew fizzy, flavorful tea at home—from fermentation basics to creative flavor ideas.
- Total Time: 7–14 days (includes fermentation)
- Yield: 1 gallon (approx. 8 servings) 1x
Ingredients
- 4–6 bags of black or green tea (or 1 tbsp loose tea)
- 1 cup granulated white sugar
- 14 cups filtered or spring water
- 1 SCOBY (symbiotic culture of bacteria and yeast)
- 1–2 cups plain starter tea (from previous batch or store-bought plain kombucha)
- Optional: fruits, herbs, or juices for second fermentation
Instructions
- Boil 4 cups of water and steep tea bags for 10 minutes.
- Stir in 1 cup of sugar until fully dissolved.
- Pour the sweet tea into a large glass jar and add 10 more cups of cool filtered water.
- Once lukewarm, add starter tea and gently place the SCOBY on top.
- Cover jar with a breathable cloth and secure with rubber band.
- Let ferment in a dark, warm place (70–75°F) for 7 to 10 days.
- Once fermented to taste, remove SCOBY and save 1–2 cups as starter for next batch.
- Transfer kombucha to bottles, adding fruit or flavorings if desired.
- Seal and let sit at room temperature for 2–5 days, burping daily.
- Refrigerate and serve chilled.
Notes
Always sterilize your equipment, store in airtight bottles, and monitor for mold. Flavorings like ginger, berries, or citrus add fun variety during second fermentation.
- Prep Time: 20 minutes
- Cook Time: 0 minutes
- Category: Drink
- Method: Fermentation
- Cuisine: Global
Nutrition
- Serving Size: 1 cup
- Calories: 30
- Sugar: 2g
- Sodium: 5mg
- Fat: 0g
- Saturated Fat: 0g
- Unsaturated Fat: 0g
- Trans Fat: 0g
- Carbohydrates: 7g
- Fiber: 0g
- Protein: 0g
- Cholesterol: 0mg
What Is Kombucha and Why People Love It
What exactly is kombucha?
If you’re new to the world of homemade fermentation, you might be wondering what exactly a kombucha recipe involves. Kombucha is a tangy, slightly fizzy fermented tea traditionally made with black or green tea, sugar, and something called a SCOBY (short for “symbiotic culture of bacteria and yeast”). The result is a bold, gut-friendly beverage that’s become a staple in health-conscious kitchens across the country.
My journey into crafting the perfect kombucha recipe began when I realized I was spending way too much money on store-bought bottles that didn’t quite hit the spot. There’s something satisfying about brewing your own batch, watching it fizz, and then flavoring it to your taste. Plus, every batch feels like a little science experiment—and the results can be incredibly refreshing.
A short history: from ancient China to modern kitchens
The earliest roots of the kombucha recipe stretch back over 2,000 years to Northeast China, where it was called the “Tea of Immortality.” From there, it traveled along trade routes to Japan and Russia, eventually landing in Western kitchens. Despite its trendy reputation, this probiotic tea has a deep traditional history that’s stood the test of time.
For me, learning this background gave the brewing process more meaning. I wasn’t just making a drink—I was carrying on a global tradition. Each kombucha recipe is like a cultural time capsule, connecting you to centuries of wellness rituals and kitchen wisdom.
It’s easy to see why people fall in love with the process. From that first pour of sweet tea to the satisfying “pop” of a carbonated bottle, every step of making a kombucha recipe becomes a ritual that feels grounding, creative, and just plain fun.
Kombucha Recipe Ingredients and Supplies
Key ingredients used in a kombucha recipe
The heart of any great kombucha recipe is simple, and that’s part of its charm. You don’t need fancy ingredients—just quality ones. Here’s what I always use in my go-to brew:
- Black or green tea: Loose-leaf or bagged, both work fine. Avoid flavored or oily teas as they can interfere with fermentation.
- Granulated white sugar: Don’t worry—it’s not for you; it’s for the SCOBY. The sugar fuels fermentation and mostly disappears by the end.
- Filtered water: Tap water with chlorine can harm the culture. I always go with filtered or spring water.
- SCOBY: The living culture that transforms sweet tea into kombucha. If you’re starting out, you can buy one or get a “baby” SCOBY from a friend.
- Starter tea: This is just unflavored kombucha from a previous batch or a store-bought plain bottle. It helps jumpstart fermentation.

Each of these plays a role in bringing the kombucha recipe to life. I used to worry that using the wrong sugar or tea would ruin my batch, but kombucha is surprisingly forgiving if you stick to the basics.
What equipment you really need to start brewing at home
You don’t need to invest in expensive gear to master your kombucha recipe. Here’s what I keep on hand in my kitchen:
- A large glass jar (1 to 2 gallons): This is your fermentation vessel.
- A breathable cover: Think tightly woven cloth or paper towel, secured with a rubber band.
- Measuring tools: For sugar and tea—precision matters in your early brews.
- Bottles for the second fermentation: I like flip-top bottles for fizz, but mason jars work too.
I’ve tried brewing in metal and plastic before—don’t. Stick to glass. It’s safer and helps maintain the clean environment your kombucha recipe needs.
Over time, I built up a little station on my kitchen counter, complete with labeled jars and spare SCOBYs. It doesn’t take much space, and once you get your rhythm, the kombucha recipe process becomes second nature.
Step-by-Step Kombucha Recipe You Can Make at Home
Brewing the first fermentation: step-by-step instructions
Now comes the fun part—brewing your very first batch. A solid kombucha recipe begins with first fermentation, which is where the sweet tea transforms into a tangy, slightly fizzy drink. Here’s how I do it:
- Brew your tea: Boil 4 cups of water and steep 4–6 tea bags (or 1 tablespoon loose tea) for about 10 minutes.
- Add sugar: Stir in 1 cup of white sugar while the tea is still hot, making sure it fully dissolves.
- Cool it down: Pour the sweet tea into your fermentation jar and add about 10 more cups of cool filtered water to bring the temperature down.
- Add starter and SCOBY: Once the tea is lukewarm, add 1–2 cups of starter tea and gently place your SCOBY on top.
- Cover and ferment: Cover the jar with a breathable cloth, secure it, and leave it in a warm, dark place (around 70–75°F) for 7 to 10 days.
I like to taste my brew around day 7. If it’s still too sweet, I let it go a bit longer. Every kombucha recipe is slightly different, and learning when your tea reaches the perfect tang is part of the magic.

The second fermentation: flavoring and carbonation tips
After your tea has finished fermenting, you’ll enter what’s called the second fermentation. This step adds the fizz and flavor that make your kombucha recipe shine.

- Remove the SCOBY and reserve some tea: Keep 1–2 cups of kombucha from this batch to use as a starter next time.
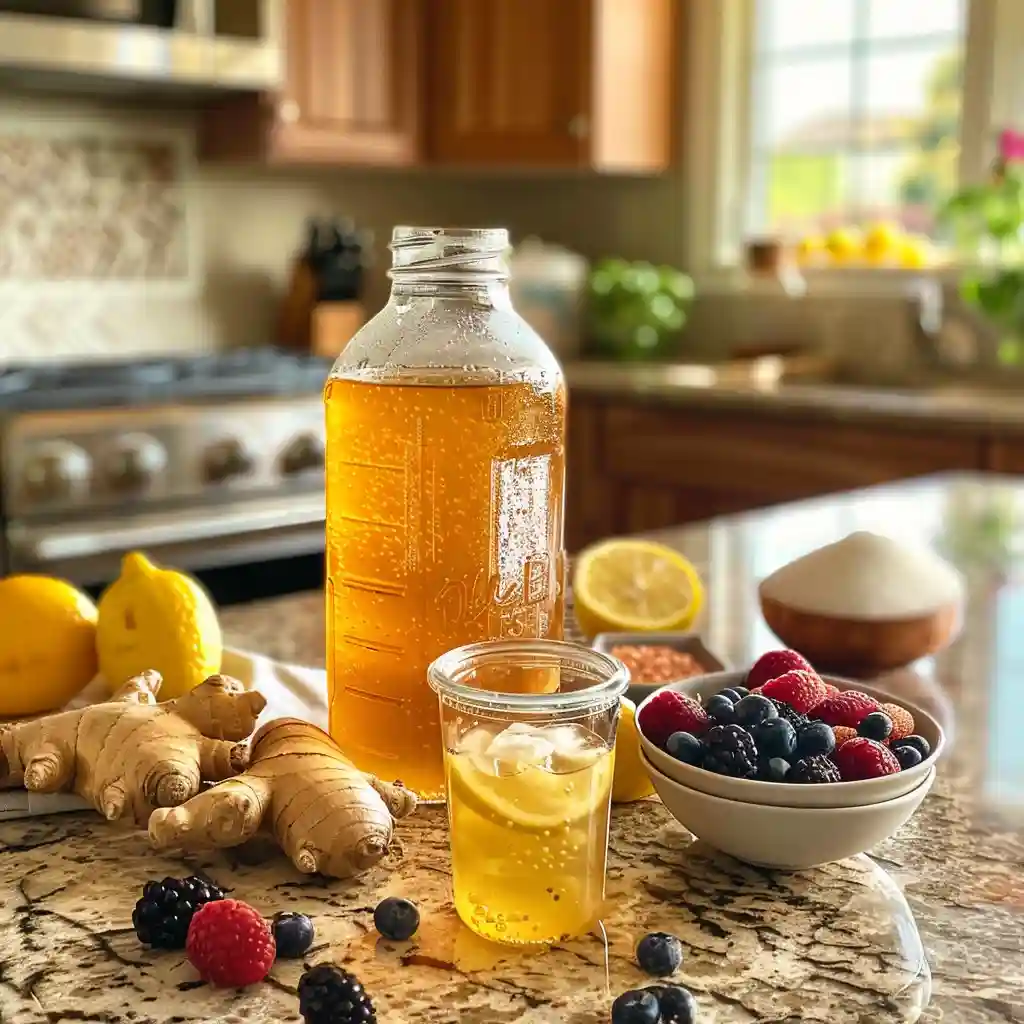
- Add flavor: Pour the kombucha into bottles and add fruits, herbs, or juices. Ginger and berries are my go-tos.
- Cap and store: Seal the bottles tightly and let them sit at room temperature for 2–5 days. Burp them daily to avoid pressure build-up.
- Refrigerate and enjoy: Once carbonated, move your bottles to the fridge. Serve chilled for that refreshing zing.
This stage is where your creativity takes over. Every time I tweak my kombucha recipe with new flavors, it feels like I’m inventing something personal. Whether it’s mango-lime or lavender-lemon, the possibilities are endless—and that’s what keeps me coming back to brew more.

Kombucha Fermentation Timeline and Storage Tips
How long to ferment kombucha for different flavor profiles
One thing I quickly learned when testing my first kombucha recipe was that time changes everything. The longer your tea ferments, the less sweet and more acidic it becomes. If you’re into smooth, slightly tangy flavors, 7 days might be perfect. If you like your kombucha punchy and sour, let it go 10–14 days.
Personally, I hover around day 9. That’s where my kombucha recipe hits that perfect balance—just enough tartness with a whisper of sweetness left behind. Temperature matters too. Warmer kitchens speed up fermentation, so if it’s summer, I check earlier. In winter, I wait a little longer.
Use a clean straw to taste a bit each day starting around day 6. It’s your best tool for dialing in your ideal brew. The beauty of a good kombucha recipe is that it teaches you to listen to your ingredients. Over time, you’ll develop a feel for when it’s “just right.”
Storing kombucha properly for freshness and fizz
Once your kombucha recipe has completed its second fermentation, proper storage keeps that hard-earned flavor intact. I transfer my flavored bottles straight to the fridge to stop fermentation and preserve the fizz. A cool environment helps slow bacterial activity, which means your kombucha stays crisp and delicious for weeks.
Always use clean, airtight bottles. I made the mistake of storing mine in a half-sealed jar once. Big regret. The fizz vanished, and the flavor turned flat. Now, flip-top bottles are my go-to—they’re reliable and make that satisfying pop when opened.
Also, keep your bottles away from sunlight. I store mine in the back of the fridge and label each one by flavor and date. That way, I always know which kombucha recipe to reach for when I need a midday refresher.
If you’re making a big batch, consider setting a calendar reminder for burping or opening bottles during the second fermentation. It’s a small habit that saves you from cleaning up an explosive mess—trust me, I’ve been there.
Ready to get creative? Try brewing your next kombucha recipe with a tropical twist—pineapple and mint is a favorite in my house.
Health Benefits of Drinking Kombucha (Traditionally Associated)
How kombucha may support gut health
I’m no doctor, but from what I’ve read and experienced, the appeal of any kombucha recipe goes beyond its bold taste. People around the world brew this fermented tea because it may support digestion and gut balance. Thanks to its natural probiotics—friendly bacteria produced during fermentation—kombucha is often seen as a gut-friendly drink.
When I started sipping a small glass of my homemade kombucha recipe each morning, I noticed I felt a bit lighter, especially after meals. While everyone’s experience is unique, many traditional wellness cultures associate kombucha with digestive ease. It’s not a magic fix, but it can be a refreshing addition to a balanced lifestyle.
One thing I love about brewing my own kombucha recipe is knowing exactly what’s in it. No hidden sugars or additives—just tea, water, sugar, and time. That simplicity helps me trust what I’m drinking.
Kombucha and digestion: traditional uses and anecdotal reports
Historically, cultures in China, Russia, and Japan brewed kombucha long before it became trendy in the West. They didn’t talk about gut microbiomes back then, but they knew something good was happening when they drank it. Those centuries of practice are what give any kombucha recipe that rich background of trust.
I’ve had friends tell me it helps them feel less bloated or more regular, especially when they drink it consistently. Again, results may vary—but hearing these stories made me feel more connected to a larger community of home brewers who simply enjoy what this tea may offer.
Whenever someone asks why I still make my own kombucha recipe instead of buying from the store, my answer is simple: I like knowing where my wellness habits come from. Brewing it myself feels grounding. It’s a ritual I look forward to—and it tastes better when it’s yours.
Of course, like any fermented drink, it’s best to start with small servings and see how your body reacts. Not every gut is the same, and that’s okay. Just let your kombucha recipe be part of a wider, more mindful routine.
Kombucha Safety: What to Watch Out For
Why was kombucha taken off the market before?
When I first got into home brewing, I stumbled across a news headline from the ’90s that kombucha had been pulled from some store shelves. That got my attention. It turns out the issue wasn’t with the kombucha recipe itself, but rather improper fermentation and storage. Unpasteurized commercial batches had inconsistent alcohol levels, which triggered concern from regulators.
That’s when I realized that brewing a kombucha recipe comes with responsibility. You’re dealing with live cultures, and they need the right environment to stay safe. Since then, commercial standards have improved, but it reminded me how important it is to learn good home-brewing practices from the start.
Safe practices to avoid mold and contamination
Over the years, I’ve picked up a few non-negotiables when working on a kombucha recipe in my own kitchen. First: cleanliness. Always sterilize your jar, utensils, and hands before brewing. Any leftover soap or grime can throw off the balance and invite unwanted bacteria.
Next, keep a close eye on your SCOBY. It should be white or light brown, slightly spongy, and maybe a little stringy. If you spot fuzzy spots, especially blue, green, or black mold, throw the entire batch out. Trust me, no kombucha recipe is worth risking your health.
Temperature is another key player. Your brew wants to be in a warm but not hot place—about 70°F is the sweet spot. Too cold and fermentation slows. Too hot, and your culture could suffer.
Lastly, don’t cover your jar with a lid. Your kombucha recipe needs airflow, so use a clean cloth and rubber band. This lets the good bacteria thrive and keeps contaminants out.
These steps may sound intense, but they become second nature quickly. The more you brew, the more confident you’ll feel. A safe and tasty kombucha recipe is just about being attentive. And once you get the hang of it, the reward is a fizzy, feel-good drink you’ll be proud of.
Flavored Kombucha Recipe Variations to Try
Fruity flavors: berries, citrus, and tropicals
I still remember the first time I flavored a kombucha recipe—it was blueberry-ginger, and the bottle exploded when I opened it. That’s when I learned two things: one, fruit sugars supercharge carbonation, and two, flavoring is where the magic really happens.
If you’ve brewed a basic kombucha recipe, adding fruit is your gateway to endless variety. You can start with chopped strawberries, a handful of blueberries, or even a few slices of orange. Want a tropical twist? Pineapple, mango, or passion fruit deliver bold flavors that mix beautifully with the tea’s tang.
Here’s a simple combo I’ve used in my own kombucha recipe:
- 1/4 cup mashed raspberries
- A few strips of lemon peel
- 1 teaspoon of fresh ginger
Just toss it into your second fermentation bottle, seal it, and let it sit for 2–3 days. Chill, strain, and enjoy. It’s refreshing, energizing, and never gets old.
Herbal blends: mint, hibiscus, ginger, and more
When I’m in the mood for something more soothing, I lean toward herbal-infused versions of my favorite kombucha recipe. Mint is subtle but cooling. Chamomile adds calm. Hibiscus turns your brew a stunning ruby red and adds a tangy kick that balances beautifully with raw honey or green tea bases.
If you’re experimenting for the first time, try adding fresh mint and lime to your kombucha recipe—it’s like a healthy mojito. Or steep dried hibiscus in hot water, let it cool, and use it as a flavor base. I’ve even used lavender and basil for a surprisingly elegant twist.
The best part? You can tailor each kombucha recipe to the season. In summer, I lean into bright citrus. In fall, apples and cinnamon. In winter, I brew spiced pear. Every bottle becomes a little seasonal ritual that brings the kitchen to life.
There’s no one right way to flavor your kombucha recipe. Trust your taste buds, keep notes, and don’t be afraid to get creative. Flavoring has become the part of the process I look forward to most—it’s like dressing up your tea in something brand new.
Kombucha Brewing Mistakes and How I Learned from Them
Common issues: over-fermenting, no fizz, or funny smells
When I started brewing my first kombucha recipe, I made every mistake in the book. One time, I forgot about a batch for nearly three weeks. What was meant to be tangy turned into straight vinegar—so sour it made my eyes water. Another time, I sealed the bottles too early, and they barely fizzed. Learning from these early flops helped me fine-tune my process.
If your kombucha recipe ends up too flat, chances are your second fermentation lacked enough sugar or time. Try adding a little fruit juice and letting it sit for an extra day. On the flip side, if your jar smells “off”—think cheese or rotten eggs—it’s probably contaminated. Always clean your tools, and never reuse a SCOBY from a questionable batch.
Fizz, too, takes practice. Every kombucha recipe reacts differently to temperature, sugar content, and flavorings. I’ve had bottles that bubbled beautifully and others that didn’t pop at all. That’s part of the journey.
My first failed batch and what it taught me
My biggest disaster? I stored a finished kombucha recipe next to a hot oven. I didn’t realize that heat would keep fermentation going. One morning, I heard a loud pop—followed by glass shattering. The bottle exploded. My kitchen smelled like fermented cherries for two days.
It was a mess, but it taught me to always store kombucha in a cool, dark spot. Now, I leave a sticky note on the fridge that says “Fizz Check” and burp my bottles daily during second fermentation.
I also used to panic if my SCOBY sank to the bottom. But over time, I learned that’s completely normal. Every kombucha recipe looks a little different, and your SCOBY might float, sink, tilt, or grow baby layers—it’s all part of the process.
Mistakes don’t mean failure. They mean you’re learning. Every brewing misstep helped me build confidence and gave me stories to laugh about later. If you’re new to making a kombucha recipe, expect some hiccups. Just stick with it—it’s absolutely worth it.
How to Keep a Continuous Brew Kombucha Setup
What is continuous brewing and why some people love it
If you’ve made a few batches already, you’ve probably realized that a good kombucha recipe disappears fast. That’s where continuous brewing comes in—a system that lets you always have kombucha ready without starting from scratch each time.
In this method, you keep your SCOBY in a large jar and remove some finished kombucha while adding fresh sweet tea every few days. It’s the same kombucha recipe, just on a rolling schedule. I first tried this when I realized I was brewing more often than I was cooking dinner. With continuous brew, you get a steady supply of tangy, fizzy goodness without constant sterilizing and restarting.
Plus, it’s a time-saver. Once your kombucha recipe is in motion, you’re just topping it off, tasting, and bottling what you need. The flavors mellow and deepen over time, and the SCOBY gets super strong—which usually means more reliable carbonation and fewer issues with contamination.
Setting up your own system at home
To set up your own continuous brew, you’ll need a large glass jar with a spigot, a breathable cover, and the same ingredients you use in your basic kombucha recipe. Fill your jar with brewed sweet tea, add your SCOBY and starter liquid, and let it ferment like usual for 7–10 days.
Then, pour out what you want to drink—up to 30% of the jar—and replace that amount with fresh sweet tea. I do this once a week, and my kombucha recipe always tastes balanced.
One tip: always clean the spigot before every use. Gunk can build up, and you don’t want to compromise the whole batch. I also rotate flavorings to keep things fun—one week it’s peach basil, the next it’s ginger lime.
The continuous brewing method helped me turn my kombucha recipe into a daily ritual. It sits proudly on my kitchen counter, covered with a cloth and quietly bubbling away. I still get excited every time I bottle a new flavor or hear that “pop” when I open a fresh bottle.
Once you get started, you’ll wonder how you ever went back to single batches. Continuous brew doesn’t just save time—it keeps your kombucha recipe alive and thriving.
FAQs About Kombucha
What are the ingredients in kombucha?
A traditional kombucha recipe uses just a few ingredients: black or green tea, white sugar, filtered water, and a SCOBY (Symbiotic Culture of Bacteria and Yeast). You’ll also need a bit of starter tea from a previous batch or a store-bought unflavored kombucha. That’s it—simple ingredients, big flavor.
If you’re brewing at home, following a trusted kombucha recipe helps you avoid the same issues. Keep your gear clean, store your bottles safely, and always trust your senses.
Conclusion: Your Kombucha Journey Starts Now
By now, you’ve seen that crafting a kombucha recipe isn’t just about making a drink—it’s about creating a rhythm in your kitchen. From selecting the right tea to mastering second fermentation, each step becomes more intuitive the more you brew.
I’ve spilled tea, cracked bottles, and even forgotten a SCOBY in the back of the pantry. But every mistake has helped me shape a better kombucha recipe—one that fits my taste, my time, and my lifestyle.
Whether you’re going for bold berry fizz, earthy ginger spice, or something seasonal and new, your next batch can be a flavorful adventure. And once you get into continuous brewing, you’ll never run out of options—or kombucha.
Check out this probiotic soda guide if you’re curious about other fizzy, gut-friendly recipes. Or don’t miss our berry basil detox drink for more fermentation fun.
And hey, I’d love to see what you’re brewing next. Share your favorite kombucha recipe twist with me—I’m always looking for inspiration.
This recipe is shared for informational purposes and is not a substitute for medical advice. Everyone’s body is different, so listen to yours and sip thoughtfully.
Want more ideas like this? Let’s connect on Facebook and Pinterest. There’s always something new bubbling in my kitchen.